When my partner and I moved in together, it was the first time I’d rented an apartment that I wouldn’t have to share with a roommate (my partner not included). Obviously I was thrilled at the decorating freedom I would finally have (especially the kitchen upgrades I’d be making), but my excitement was cut short when I realized the limitations involved with living in a rental.
Depending on where and what kind of building you live in, renting can either mean plenty of freedom or none at all. You may be required to ask your landlord for permission for every next step, or you may be able to do what you want within reason.
From a bit of research, I quickly learned that small changes were generally OK in Berlin where I live—and I’ve heard the same from plenty of friends stateside. If we played our cards right, we could easily make a big difference with some smart switches. No, we wouldn’t be breaking down the wall in the kitchen that I wanted to break down, but numerous high-impact, low-cost solutions would ensure we could had everything we wanted without getting our landlord’s approval.
If you’re not totally in love with the original kitchen set up in your rental (who is?) we’ve rounded up some tried-and-true tips to revamping it yourself, no matter what your budget is. From covering up a boring 90s backsplash with a modern stick-on tile to zhooshing up the cabinets with a pop of color, these are 17 DIY kitchen upgrades you can make in just about any rental.
Creative storage saves space and adds style.
If you’re tired of stuffing everything into the same drawers and hoping for the best, use your new space as an opportunity to explore creative storage solutions. Though a lot of it will be behind the scenes, you’ll be surprised at how much it elevates your kitchen’s potential overall.
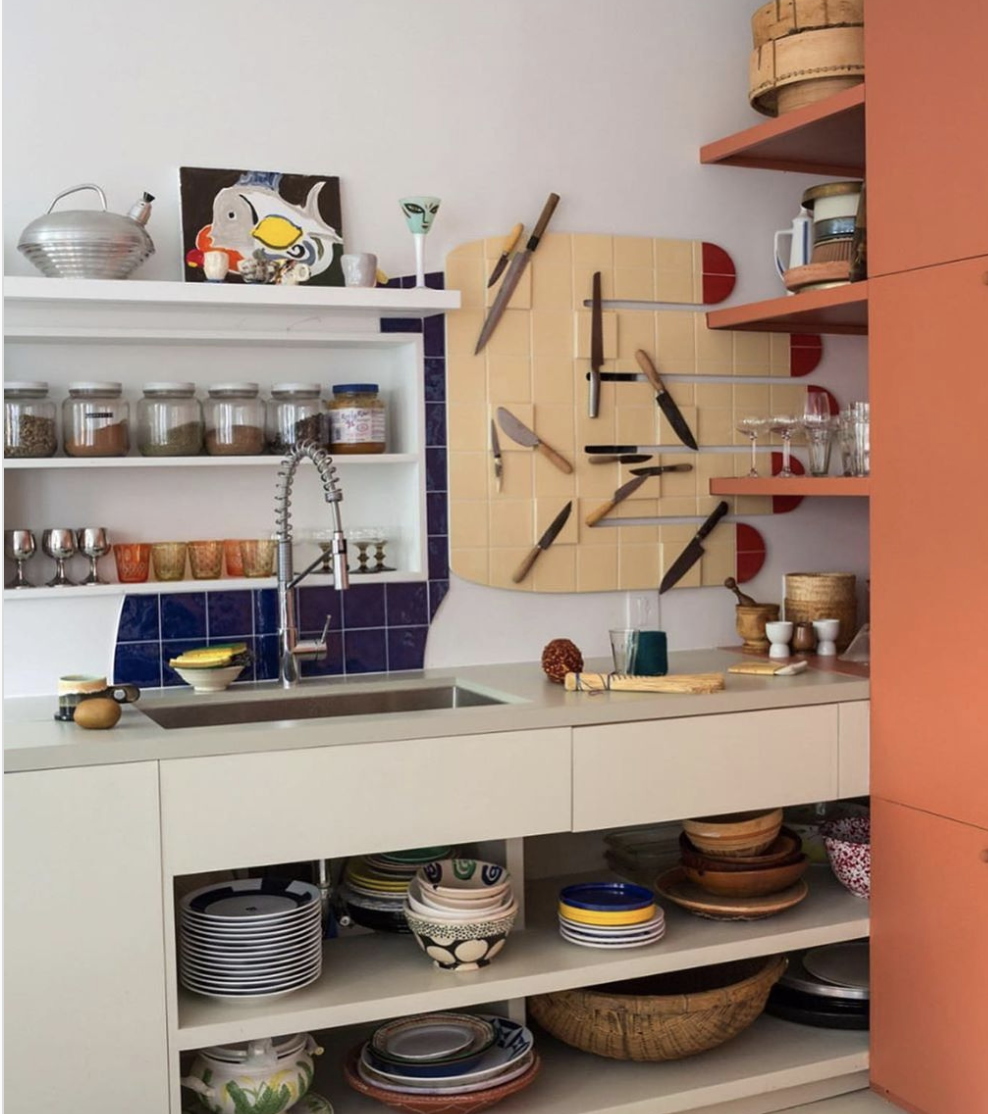
1. Stick a knife magnet on the wall.
Now is the time to finally swap your infernal, space-hogging knife box for a magnet strip. Not only will it better maintain the quality and sharpness of your knife, it will also add a nice design element to your space, especially if you have some knives you’d like to showcase. It doesn’t have to be exclusively for knives either. Anything metal—slotted spoons or tongs, for example—can be hung up on this space-saver.
2. Or add a magnet strip to your backsplash
Magnet strips are a great way to add a bit of flare to what might otherwise be a boring backsplash. You can use them to get really creative, but they’re also great if you’d prefer to keep it simple.
3. Get on a ladder and mount a pot rack from the ceiling.
There are plenty of smart pot and lid cabinet organizers that you can buy for a fair price. In spite of them, I often find that things contend to get disorganized anyway. Not to mention, I have some pretty pots and pans that I’d like to show off! Enter: the pot rack. It completely eliminates the stress involved with stacking and tidying pots and pans, and it’s not a bad place to hang a plant from either.
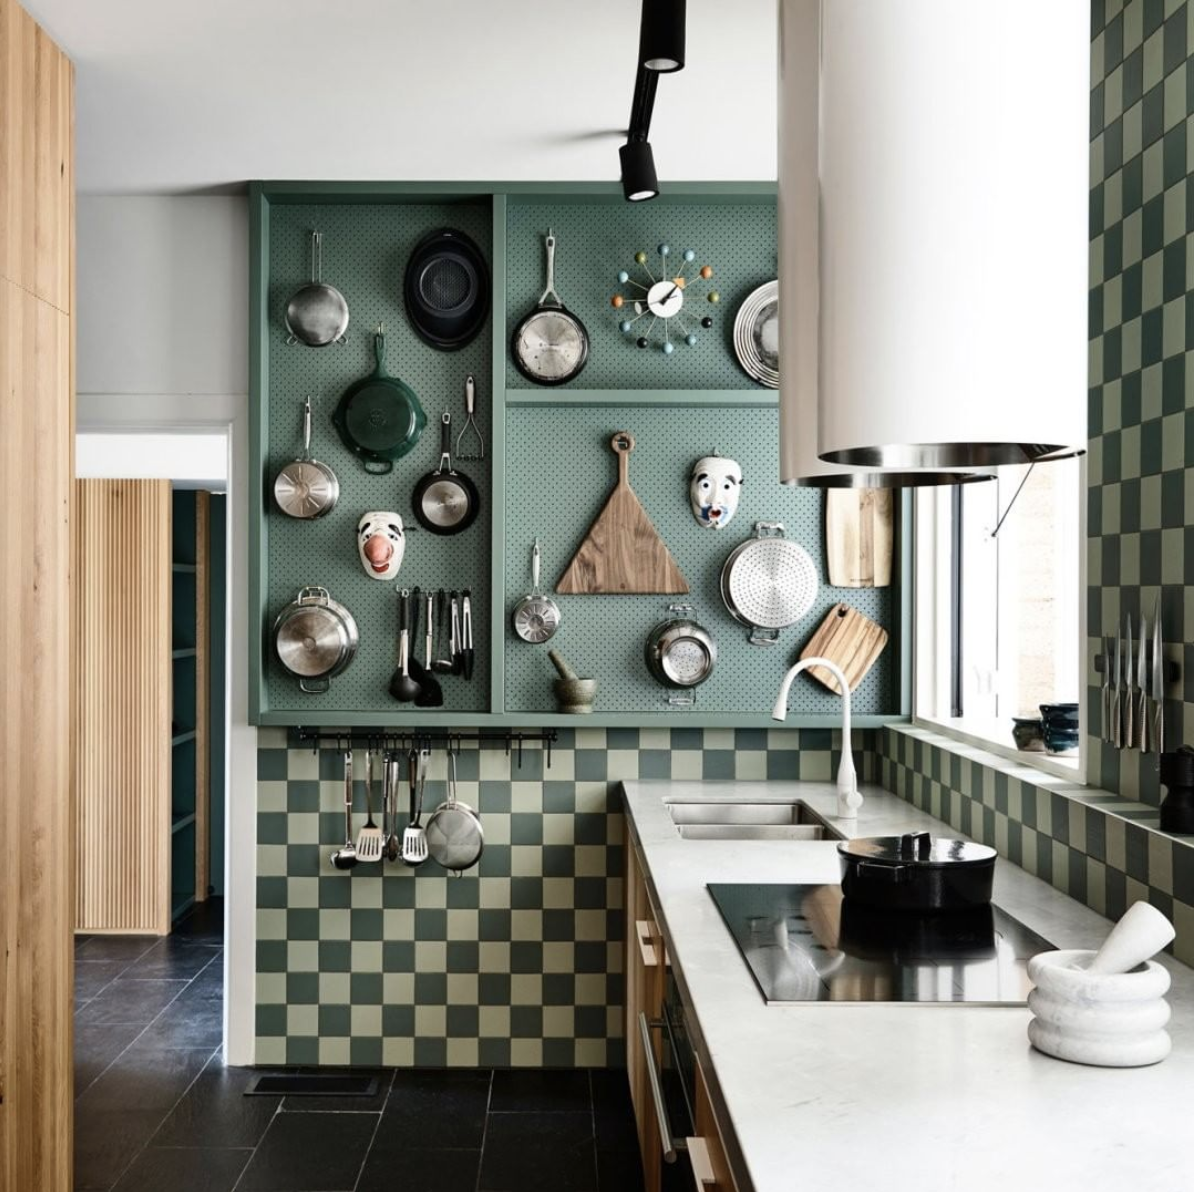
4. Or a put up a pegboard if that’s better for your walls.
You’ve probably seen this trendy storage solution circulating on social media, and that’s for good reason. It’s stylish, easy to put up, and affordable. You can get a plain, white mid-size option for about $20 and paint to suit your style. And you can hang just about anything from it!
5. Organize a space for your spices once and for all.
There are so many excellent and affordable ways to sort your spices and keep them that way, and when you first move in is the perfect time to take care of it. Invest in a rack and a bunch of small jars to hang from your pegboard. Or buy metal tins that you can stick to your magnet strip.
6. The more shelves the merrier.
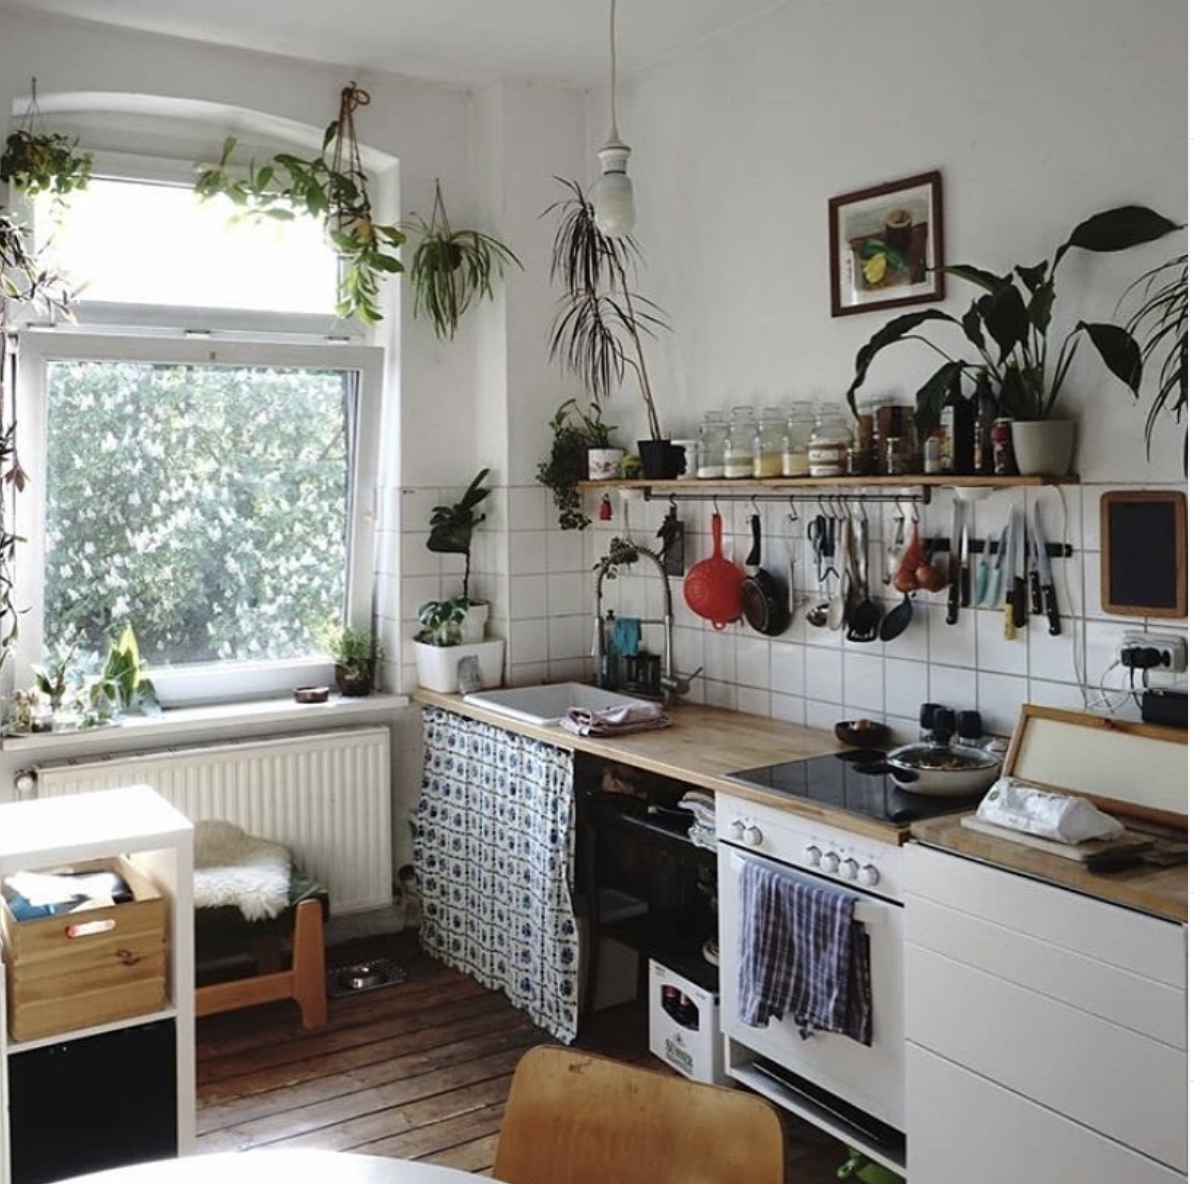
We did not skimp on the amount of shelves we hung up when we first moved in because we didn’t have a lot of cabinets and we knew it would be a cheap, fun, and open solution. So far it’s been a success. We have one large cabinet area to keep clutter out of sight (mainly ingredients and small tools), while our shelves allow us to display some of our finer dishware. Plus, it gives us plenty of space for our many, many houseplants.
Use sneaky tricks to make it seem like you did large renovations.
While removing counters or cabinets may be out of your means, there are plenty of simple ways to make it seem like you did all of that, without actually having to do any of it.
7. Change your backsplash with stick-on tiles.
The pre-installed backsplash in rental kitchens is almost never very satisfying. Luckily, it’s super easy to fix with temporary tile stick-ons.
There are a few types of stick-on tiles, but we recommend these stick-on tiles (best for flat or bare walls) or you can cover up a tile backsplash with tile stickers like these.
8. Use stick-ons to improve your countertop, too.
You might not be able to swap out your grout countertop for the marble one of your dreams. However, you can at least make it seem like you did. Stick-on countertop paper is a great solution for a home that you know you won’t be in forever, because it’s easy to replace and doesn’t cost a lot in the first place.
9. Can’t get rid of grout? Use markers to switch it up.
Grout used to be the bane of my existence until I realized that I could make it look good as new with my favorite set of Sharpies. Apply painters tape around the tiles to minimize errors, and feel free to get creative. Using black sharpie to contrast a white tile will make the space feel more bright and fresh, but using an eccentric color, like lime green, is also a fun option, too.
10. Not in love with your floor? Add a few rugs.
I was opposed to the idea of having a rug in my kitchen until I actually did it. I thought, it’s going to get stained, I’m begging for a mess, but the truth is that they aren’t that hard to clean and they add so much warmth to a space. And if you have a floor set up that you really aren’t a fan of, they’re a simple way to cover it up.
11. Freshen up your cabinets with a new coat of paint.
Though you might not be able to paint a wall if you can probably get away with painting your cabinets. You’ll be surprised at just how much it does for the space.
12. Replace your cabinet doors with curtains.
If you’ve decided to opt for more shelves than cabinet, curtains can be a fun, festive way to hide some of the more visually unsavory aspects of your kitchen, like the underneath the sink area or your spot for the garbage. Choose a fun print that will liven up your space but is easy to clean in case of spills.
13. Or just get rid of your cabinet doors altogether
An open shelf can add texture and color to a kitchen with too many upper cabinets. It’s a great opportunity to showcase your nice cookware and a few plants, especially if you don’t have any wall space to install open shelves. When you move out, just put the doors back on!
Don’t skimp on the decorations.
Making a great hang out spot is the one thing I most regret not doing in my own kitchen. I focused more on functionality, when I kind of wish I’d given a bit more attention to making a nice zone for chilling and dreaming up my next recipes. Feeling good in your kitchen is all about what you fill it with. Even though I don’t have a good spot to drink coffee, all the art and nice lighting still makes it a worthwhile place. These little deco tips will make a big difference.
14. The kitchen is the perfect place to hang cheap art.
We all have a few random IKEA paintings still hanging around from college (and we all still secretly love them). While you don’t exactly want to hang a lot of fine art in the kitchen (oil paintings especially are a no-no with all the heat and oil going around), budget paintings and prints, and postcards that were too pretty to send are all perfect for the space.
15. Swap out cold lights for warm lights.
If something in your kitchen feels off, but you’re not sure what, it’s probably the lights. The difference between harsh, white lighting and warm, yellow lights is enormous, and it’s such an easy change there’s no harm in making it.
16. Add under-the-cabinet lighting to brighten up your work station.
Stick-on, under-the-cabinet lights that have changed my life in the kitchen. I bought mine at IKEA where you can get both wired, plug-in and wireless, battery-powered options for a relatively low price. It’s one of those things you don’t realize you need until you have it, and then you can never go back to life without it.
17. Opt for a folding table to save on space.
We knew we wanted somewhere to be able to sit and drink coffee in the kitchen, but we also knew we didn’t have the space to accommodate an entire table. We ended up going for another IKEA product—a table that attaches to the wall and can fold out to open or lay flat. When I need it, I pull it up, eat what I need to eat, then put it back down and use the space to move more freely as I cook. It’s truly the best of both worlds.
18. Add an island for more counter space and storage.
Especially if you have a corner kitchen or a kitchen that’s just against one wall, getting a rolling island can be a lifesaver. You’ll not only give yourself more space for chopping and prepping, but extra space for storing cooking equipment.
Through the process of meal prepping and planning, the WWL Meal Prep Program helps all members become better cooks. Learn more about starting a free trial here!


Leave a Reply